Florals with Gouche..

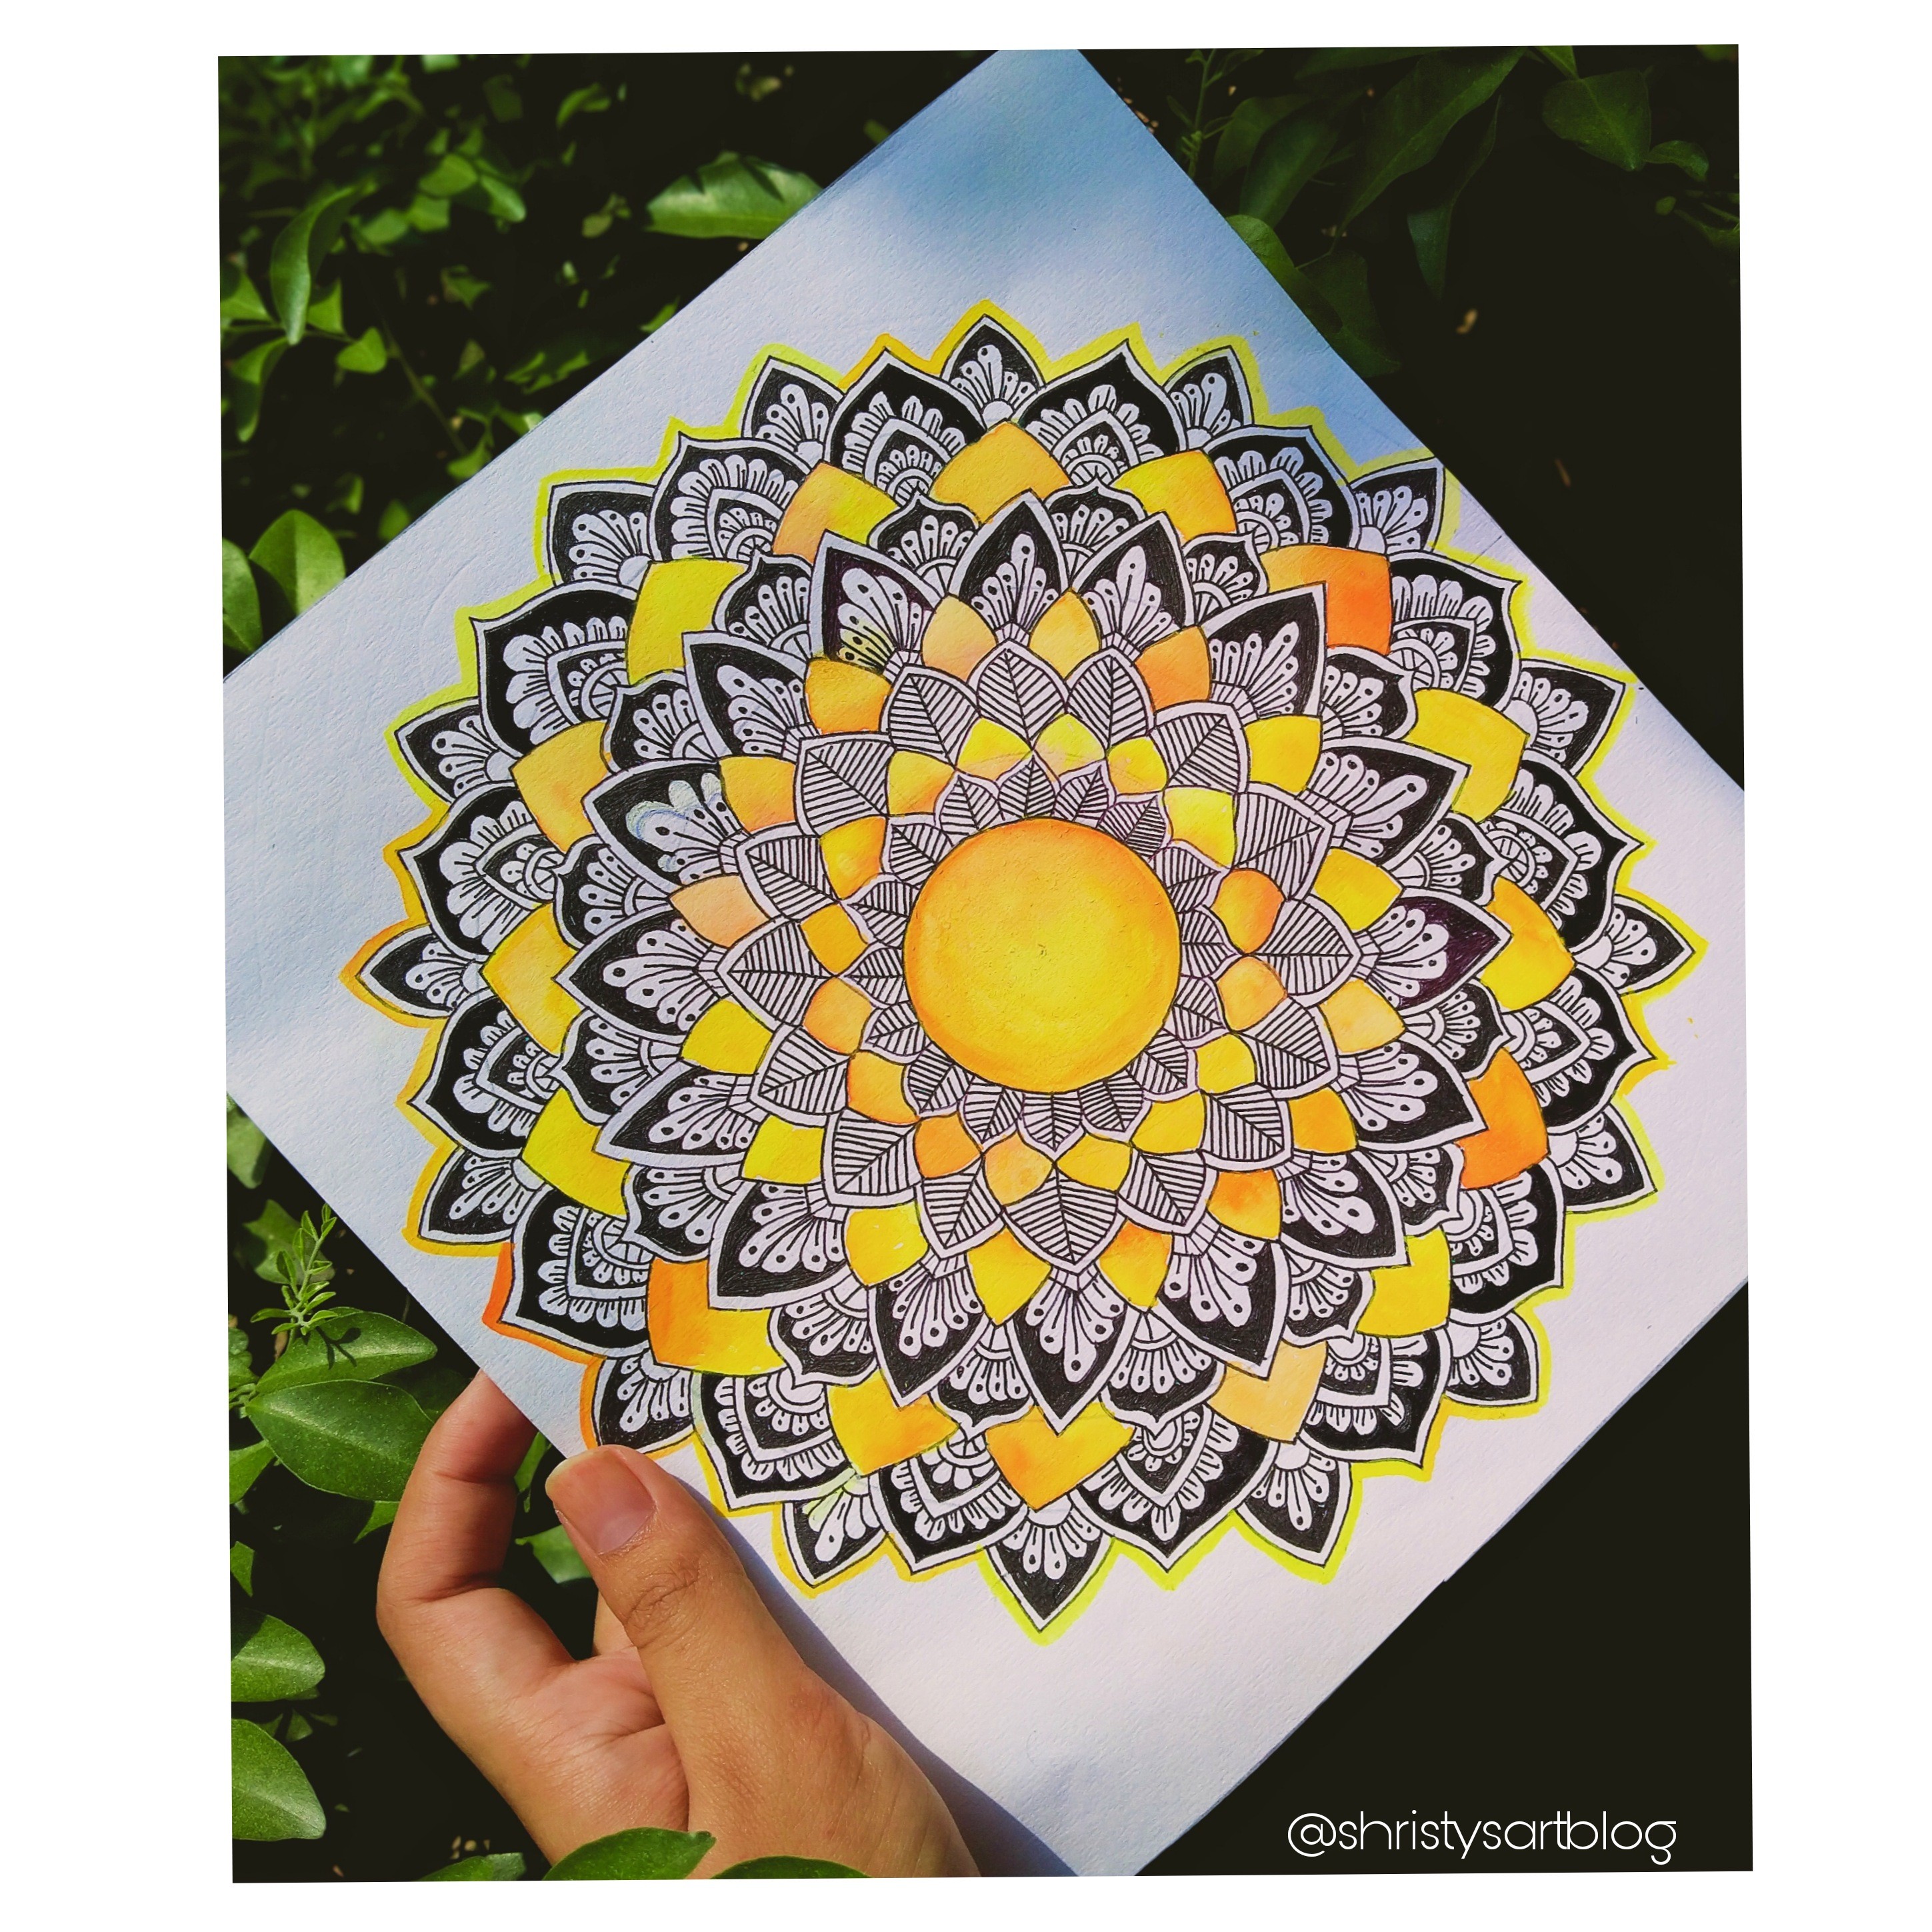
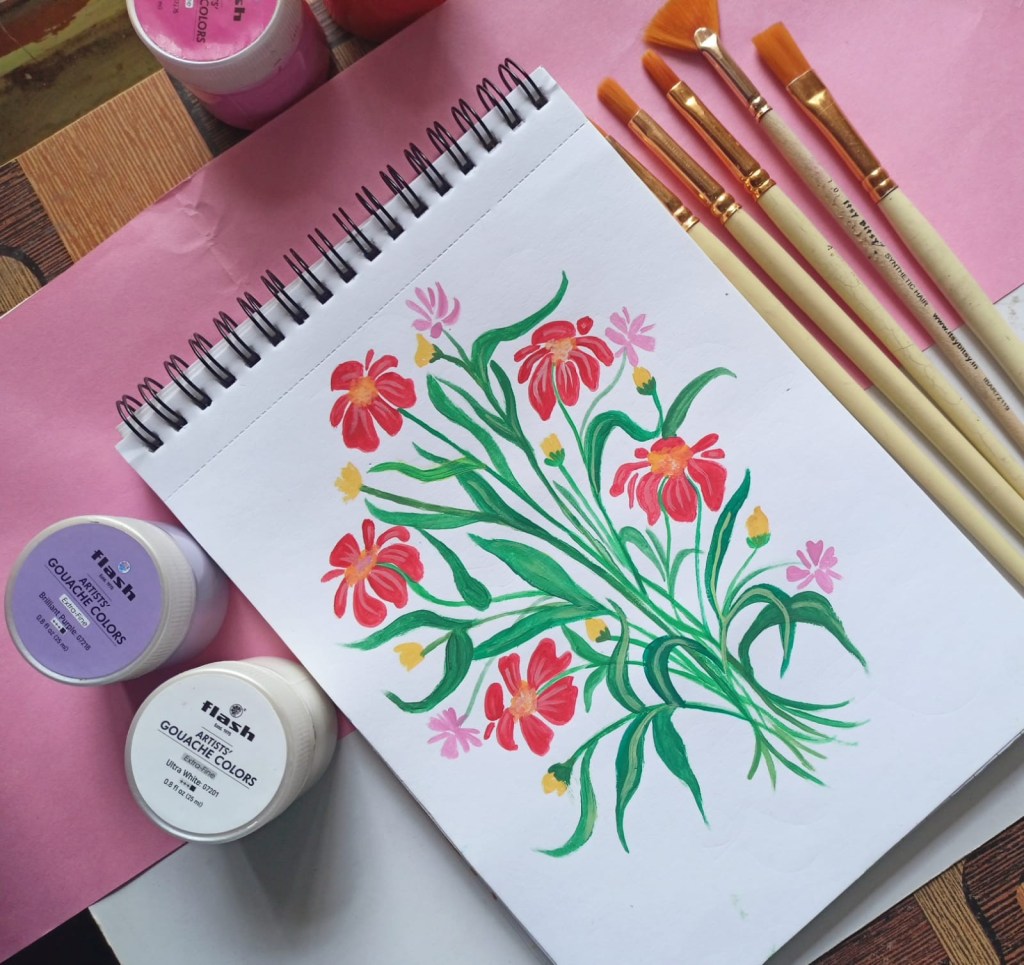
Hey everyone..This floral design is so simple and artistic.. I have used 2 to 3 shades only for making this floral design.. You can also use acrylic colours if you don’t have gouche colours..

I love using gouche colours for making floral designs.. Because the pigmentation of gouche colours are completely different from acrylic colours and also it’s very easy to blend gouche colours compare acrylic colours..

So, let’s start the painting with simple steps~

Step 1~ I have used masking tape for the boundaries.. but it is totally optional. In the background I have used dark green colour.

Step 2~ Then using a fine tip round brush.. make small leaves with light shades of green colour..

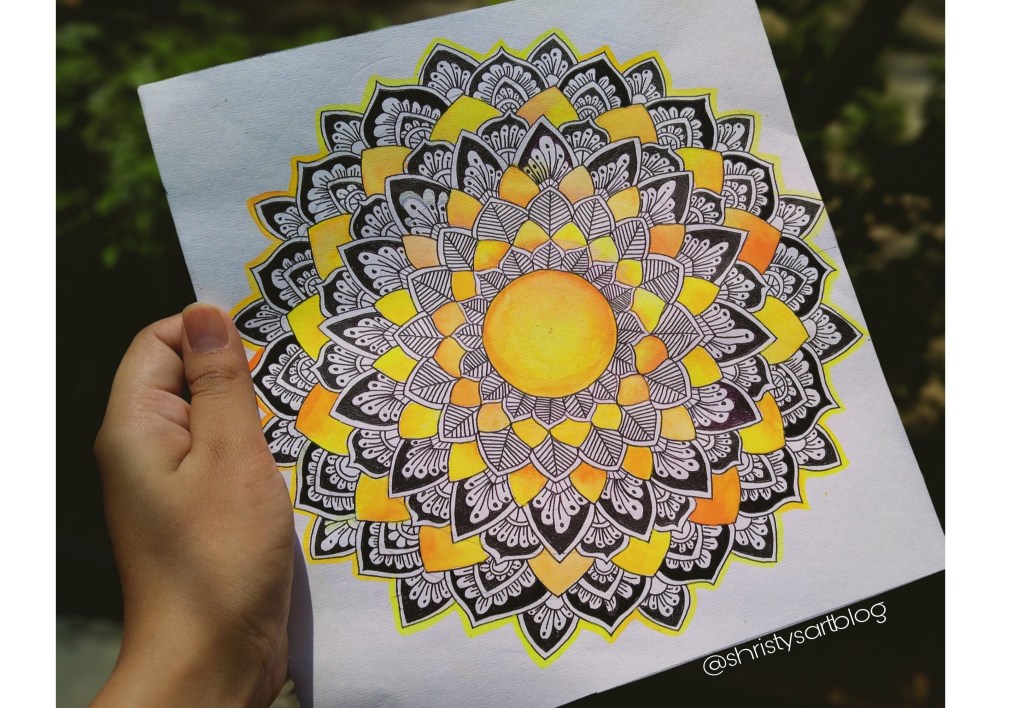
Step 3~ After painting the background use white colour for making flowers u can also use a pencil for making outlines of petals..

Step 4~ I have used yellow colours in the middle of the flowers.

Step 5~ Apply varnish to protect your painting from dust.. It’s optional.

And ya, these are the simple steps which, you have to follow for making this simple and easy floral painting..

Tips~

~For making petals use a fine tip round brush..

~Do not add to much water to your colour.

~ Use thick paper for making this painting and ya, do not use Canvas..

~ If you wanna apply varnish use a spray varnish.. Do not use the regular one.

~ Fill the blank spaces with small flower so it will look more beautiful and attractive.

Supplies ~

~ Gouche Colours

~ Paper 200gsm

~ Roud brush and flat brush

~ Spray varnish (optional)

Hope you all like this floral painting..

That’s all for today..

Stay safe and Stay healthy ❤️

Acrylic Painting On Canvas!

Hey everyone! Hope you all are doing good. I know it’s been so long time that I have not posted any painting..on WordPress.. Sorry for that.. And I will try my best to post new paintings regularly..

About This Painting..

This painting is not a regular one because in this painting I have to focus on both lighter and darker shade and the reflection of sky in water… This is not that complex but we have to keep one in our mind that where we have to use lighter and darker shades.. I have mixed two and more colours together to get a perfect reflection of sky, mountain and green trees in water..

So let’s start with our first step..

Step 1- Firstly we focus on sky

(a) We need a canvas of size 5×7inch . Then start painting with light yellow, mustard yellow and some orange colour on the top of the canvas and then using a flat brush blend all the three colours together..

(b) For making clouds we have to use lighter and darker shades of blue.. using a round tip brush make clouds randomly as you want..

Step 2- Moving on to the lower section of the canvas..

(a) when the sky is completely dreid than start making small tress.. using dark green colour.

(b) I have made the tress and the mountains in three parts with the help of a round tip brush..

(c) Make a gap in the middle section of the canvas for making the river water..

Step 3- Making the reflection of sky in water.

(a) for making the small part of the river I have used light yellow and white colour.

(b) for making the bigger part of the river I have used light blue, yellow, white and some green colour.. blend all these colours together..with a flat brush.. add some grasses.

Step 4- Finally making the dry tress on both side.. using dark brown colour with a round tip brush.

I have applied a cote of varnish after completing the steps.. its optional..

Tips –

1. I have applied gesso on the canvas before painting so it is easier for me to blend colours.. if you don’t have gesso you can use white acrylic colour too..

2. Use a flat brush for blending the colours.

3. Use a round tip brush for making the tress and the mountains.

Supplies –

1. Acrylic Colour

2. Canvas (size 5×7inch)

3. Flat brush and round brush.

4. Varnish

That’s all for today..

Stay Safe And Stay Healthy…

Acrylic Painting On Dry Leaf!

Hello everyone hope you all are doing good..So today’s post is very special it’s not the regular one, this is unique and a way beautiful..

For this acrylic painting you don’t need a paper or a canvas you just need a dry leaf.. This is not that easy to paint on it because of the uneven surface of the leaf.

Let’s start with our first step..

Step 1: First you have to apply White acrylic color or gesso to the base.

Step 2: Let it dry the base first.

Step 3: Then start adding colors of your choice, for making the sky. I have used blue+ white and violet. Be gentle while blending the colors. Use a flat brush.

Step 4: Use Sap green color at the bottom of the leave to show grasses Make grasses using a fine tip round brush.

Step 5: Then make flowers using yellow acrylic color.

Step 6: Add some clouds in the sky using white acrylic colors, use a fine tip round brush.

Step 7: Then the last step is to apply varnish.

Difficulty : Difficult

Supplies:

. Acrylic color.

. Brush

. Leaf

. Varnish

That’s all for today.

Dotted Mandala On CD..

Hey everyone.. Today I am going to share an easy yet beautiful Dotted Mandala.. For which you don’t need any canvas or a sheet.. You just need a CD…which is not in your use.. I have choosen a waste CD which is not in my use. But if you don’t have a waste CD you can also use a circular canvas or a plain sheet..

And you can also call it a room decor or a diy from a waste material.

Let’s Start With Our First Step..

Step 1: First step is to paint the base with black acrylic colour.

Step 2: After your base is completely dreid….Then start making dots with your choice of colours.. Use only acrylic colours..

Step 3: If you have dotting tools so you use that but I have not used dotting tools.

Step 4: For protecting your final art piece you can apply 1 coat of varnish on it. After it is completely dreid.. I have used varnish for protecting it from dust and water..

Supplies:

1. CD / White Sheet / Canvas

2. Acrylic Colours

3. Dotting Tools ( I have used Random things for making dots such as pen, brushes…)

4. Varnish ( optional)

That’s it for Today…

Baye… :)😉

MANDALA ART..

Hello everyone…Hope you all are doing..Today I am going to share an easy Mandala art, In which I have used watercolors..

So let’s start with our first step..

Steps..

Step 1: So the first step is to draw Mandala template grid using pencil and compass.

Step 2: Then start make patterns using a black gell pen or a fine liner pen.

Step 3: Then the last step is to fill the colours.. I have used water colour for this..

Supplies:

. Compass

. Pencil

. Paper Size A4, 160 gsm.

. Black gell pen

. Watercolors

Shades:

. Lemon Yellow

. Orange

Difficulty: Easy

That’s all for today..

City Scape With Acrylic Colours!

Hello everyone! So it’s been so long time that I have not made any city scape..I love making city scapes using acrylic colours..So let’s start with our first step…

Steps:

Step 1: Make a rough sketch of buildings, houses,clouds, plants and whatever you want to make..

Step 2: Then give some details to your painting make windows, doors and bricks..

Step 3: After your sketching is done than start filling colours of your choices..

Step 4: Use light and dark shades both, for making shadows.. So it will give you a little bit realistic and 3D look to your painting..

U can also use white gell pens for making details..

Tips:

Tip 1: Use a fine tip brush for making fine details.

Tip 2: Use different- different shades of colours..

Difficulty: Medium

Supplies:

. A3 sized paper (160 gsm)

. Acrylic Colours

. Round Brushes (no.0,1,3)

. Pencil ( for making a rough sketch)

. White Gell Pens( optional)

That’s all for today..

Hope you like this City Scape…

Easy Florals With Gouache Colours!

Hello everyone hope you all are doing good.. Today I am going to share an easy painting using Gouache Colours.. Trust me these florals are very easy to make it, and it looks so pretty and fresh..if you’re interested then give it a try..I must say that if you try this floral painting it will make your day beautiful and fresh…

If you don’t have Gouache colours..you can also use acrylic colours..

What is so special about Gouache Colours?

Gouache colours are Highly pigmented and it dreis very quickly..It is easy to use Gouache colours on dark shaded paper too..like black paper..and also it blends easily..

Let’s start with our first step..

Step 1: You can make a rough sketch of flowers and leaves with pencil if you’re not comfortable to make flowers directly with Colours. (I have made flowers and leaves directly using a fine tip paint brush.)

Step 2: Then start filling colours of your choice.

Step 3: Give some details to your painting so it will look more beautiful..And your painting is done..

Difficulty: very easy

Tips:

1. Use a fine tip brush for making flowers, leaves and stem.

2: Use different- different shades of colours.

Supplies:

. Pencil

. Gouache colours

Shades I have used: Green ,Pink, White, Red, Yellow, Pink..

. Paper (gsm 120)

. Round paint brush. No.( 0,1,2)

That’s it for today…

Stay Safe And Stay Healthy❤️

LIPPAN ART!

Hey everyone! So again I am back with a creative post which is ‘Lippan Art’. This is my second Lippan art..

I have received so many comments in my previous Lippan art post..that make more such posts…so I decided to try this again..

Let’s start with our first step..

1) First you need a canvas or a mdf base. I have used handmade canvas..

2) Then you have to paint your canvas with white colour, so you can easily blend the colours.

I have used white gesso for the base you can also use white acrylic colour.

3) Then paint it with your choice of colours..blend the colours from the centre of the canvas.

I have used black and grey colour.

4) Let your canvas dry..and then start making patterns of your choice, using a pencil..

5) Make final patterns by using clay. And stick the clay with glue.

6) Let your clay dry for atleast 1day….

7) If you want you can also paint the patterns which we have made from clay with white colour for a bright look.

Supplies:

1) Shilpkar Clay: I have used fevicryl clay. And you have to mix resin base and hardener equally. Mix a small portion of clay at a time because it dry’s very quickly.

2) Acrylic Colours: White, black and grey ( mix white and black colour together to make grey colour).

4) Brushes: Flat brush no. 12 or 8 (for blending) And a round brush no.0 or 2 ( for painting the clay with white colour).

5) Canvas: Round canvas.

6) Pencil and Compass.

7) Mirror’s: You can use your choice of shapes. I have used different shapes of mirrors.

8) Glue.

Difficulty: Medium

Hope you like this painting..That’s all for today…

FLAMINGO ACRYLIC PAINTING..

Hello everyone! Its been soo long time I haven’t made any painting by using my acrylic colours..so I decided to make a simple yet attractive painting using my acrylic colours..

Let’s start with our first step~

Step1 ~ Draw A rough sketch of a Flamingo using pencil.

Step2 ~ Start filling colours of your choice.

Step3 ~ Add some details to your painting.

Supplies~

Firstly you need a pencil for making a rough sketch.

Secondly you need a fine tip brush.

Round Brush no. 0 and Round brush no. 2

Thirdly you need acrylic colours.

Shades I have used.

~For making pink you have to mix red and white.

~ For making teal blue colour you have to mix Blue, green and white together.

~ Green and blue colour for making leaves

That’s all for today..

BRUSH PEN MANDALA!

Hello everyone, hope you all are doing good..In this Mandala I have used brush pens and fine liner pens..So let’s start with our first step..

Step 1~ first you have to make mandala template gird with the help of a compass and pencil.

Step 2~ then start making patterns using fine liner pens.

Step 3~ fill the leftover space using brush pens.

Supplies~

firstly you need compass and pencil for making Mandala template gird.

secondly you need fine liner pens for making patterns.

thirdly you need brush pens.

Paper Size: A5 (140 gsm)

Difficulty: Easy

That’s all for today..

Stay Safe And Stay Healthy..

Design a site like this with WordPress.com
Get started